
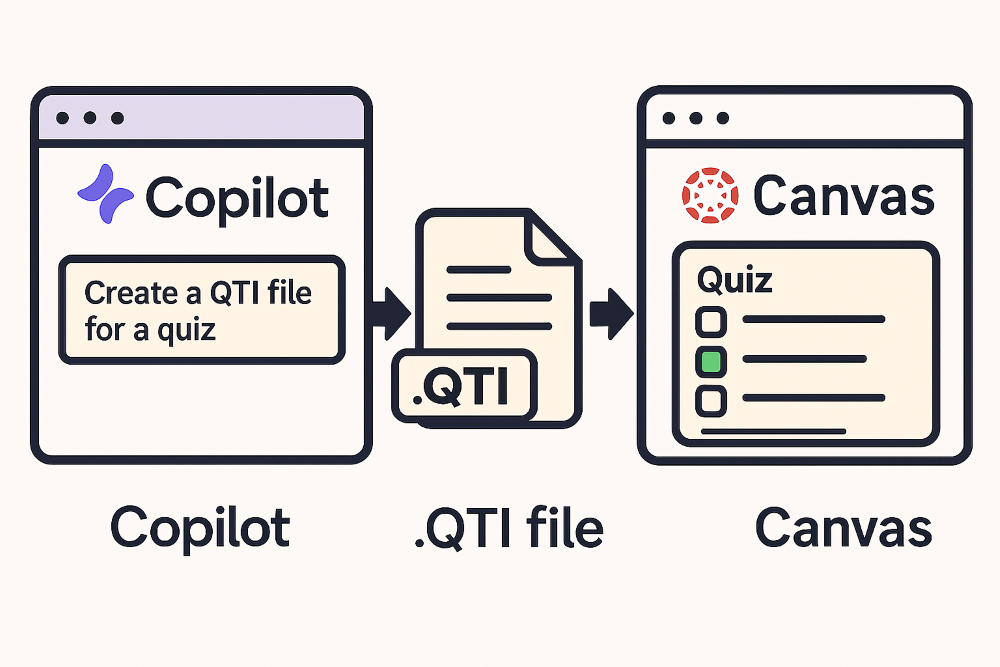
Generating a Quiz in Canvas used to take 30 – 45 minutes. Now it can be done in 5 minutes.
As an educator, one of the most valuable commodities, is time. We just don’t have a lot of time to complete our tasks. We are constantly on stage with students in front of us. So, if the opportunity arises that we can save time in creating assessments and assignments, we take it.
This post is geared directly for educators who are interested in creating a QTI V 2.1 downloadable file from Copilot Chat. However, the prompt example provided can be used on any AI of your choice and should have positive results.
Here’s a quick note: I’ve tested Claude, ChatGPT, and Copilot for generating QTI files, and in my experience, Claude delivers the most seamless results. While ChatGPT and Copilot can certainly create QTI files, Claude consistently produced error-free outputs throughout my testing. That said, Claude does require a paid subscription.
Below you will find 16 steps on how to create a QTI file based on your content and import it into Canvas for generating a quiz.
**BLOG UPDATE NOTICE**

01/09/2026 - Added additional question types for "New Canvas Quizzes" generation.  Go to step four for additional information.
Step 1: (Locate Copilot)
Locate your Copilot icon in the Clever interface (only for Clever accounts). All other will need to locate your version of Copilot icon. Double click the icon to execute Copilot.
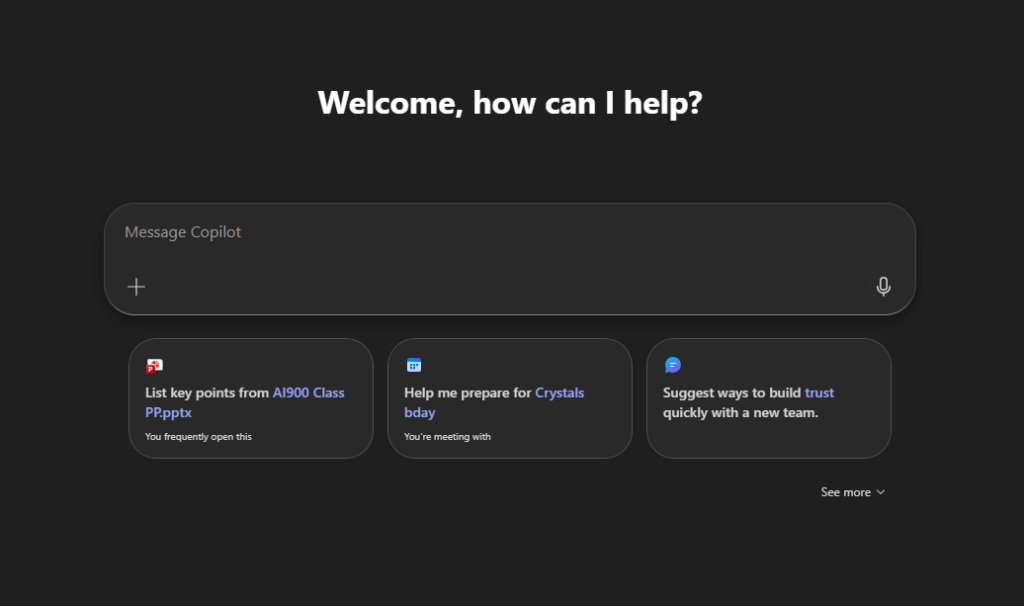
Step 2: (Open your new chat session)
You will see a screen as shown below or similar as your “New Chat” session.
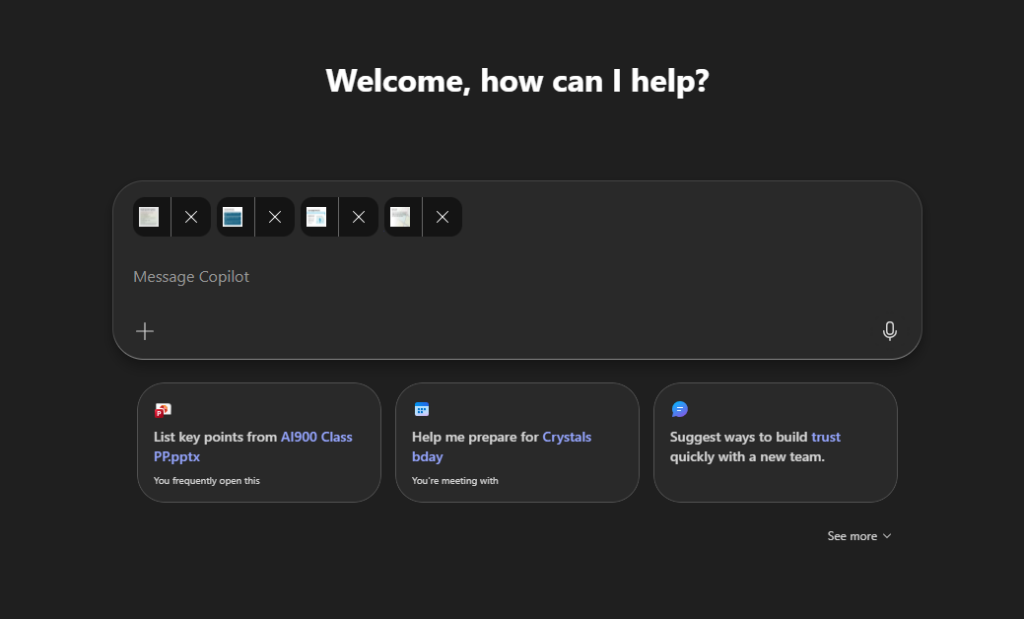
Step 3: (Add files for the content of your quiz)
On this portion you can copy and paste documents using your cntrl+c (copy) command to copy individually slides, or other documents to store in memory. You can drag and drop or click the “+” symbol to select your files. Once copied to memory, you can use cntrl + v (paste) to paste your document into the field labeled “Message Copilot”. You will be able to paste up to 20 files into the chat field.
For this example, I pasted a couple of slides from my PowerPoint used in class. Your screen will look like this when your slides have been pasted to the input field.
Step 4: (Add your prompt)
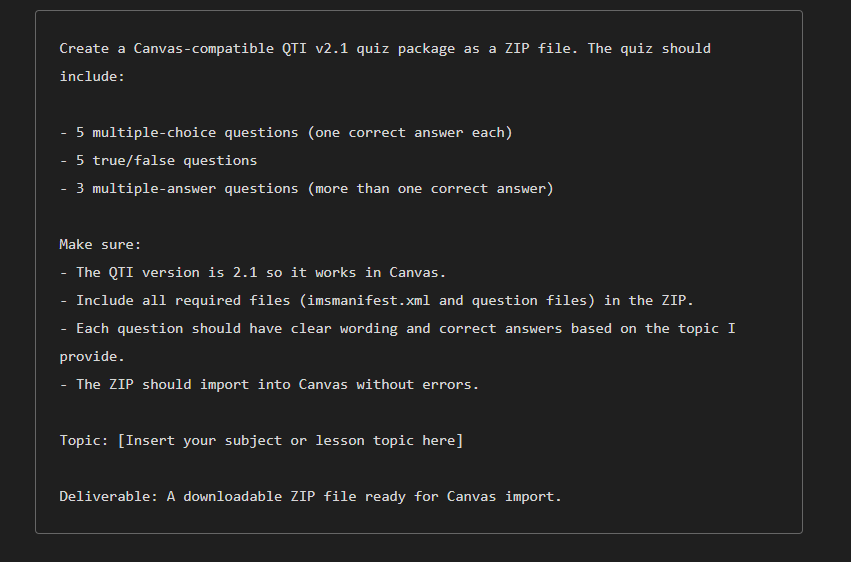
I have an example prompt that you may use as a guide. You will have to make some modifications to the prompt to better fit your needs:
Create a Canvas-compatible QTI v2.1 quiz package as a ZIP file. The quiz should include: 5 multiple-choice questions (one correct answer each), 5 true/false questions, 3 multiple-answer questions (more than one correct answer) Make sure: The QTI version is 2.1 so it works in Canvas. Include all required files (imsmanifest.xml and question files) in the ZIP. Each question should have clear wording and correct answers based on the topic I provide. The ZIP should import into Canvas without errors. Topic: [Insert your subject or lesson topic here] Deliverable: A downloadable ZIP file ready for Canvas import.
Note: It is recommended to ask AI to align the question styles to the FAST or EOC standards (in Florida) a (highly recommended to upload a sample state assessment if applicable. For example, a sample FAST ELA test so AI can copy the question and answer style).
Grade level and ability should be included specifically (English Honors)
“Always review questions for accuracy before publishing to students.”
**UPDATE NOTICE**
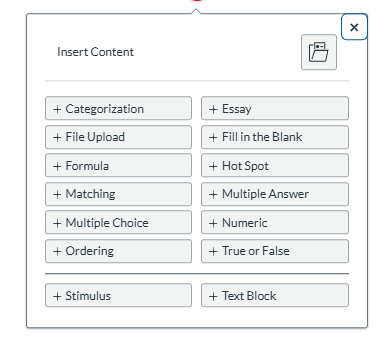
01/09/2026 - For those users wanting to generate other types of questions in the "New Quizzes/Survey" you may use the types shown below in the following screenshot:
Warning: Adding more complex question types such as Hot Spot, Fill in the blank, Stimulus and Textblock might require manual question editing in order to get the proper results.
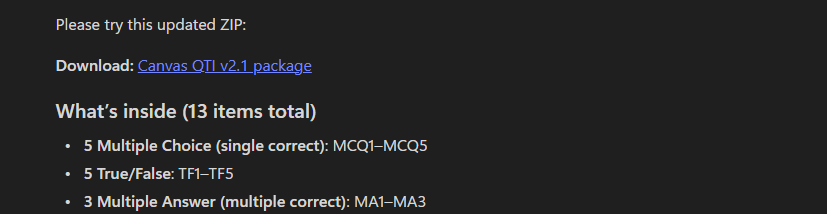
Step 5: (Download your QTI file to your downloads folder from Copilot)
Once Copilot is done generating the file for you, you will receive a link to download the file. See below for an example:
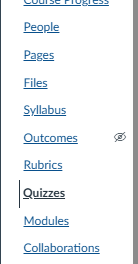
Step 6: (Go to the Quizzes section)
Log into Canvas and in your course, click on the “Quizzes” link on the menu.
Step 7: (Create a new quiz)
You will want to click on the “+Quiz/Survey” button on the top right hand corner to create a new quiz.

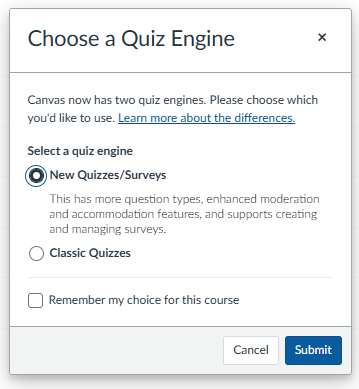
Step 8: (Select Quiz Type)
On the “Choose A Quiz Engine” dialog window, select “New Quizzes/Survey” option and click submit when enabled.
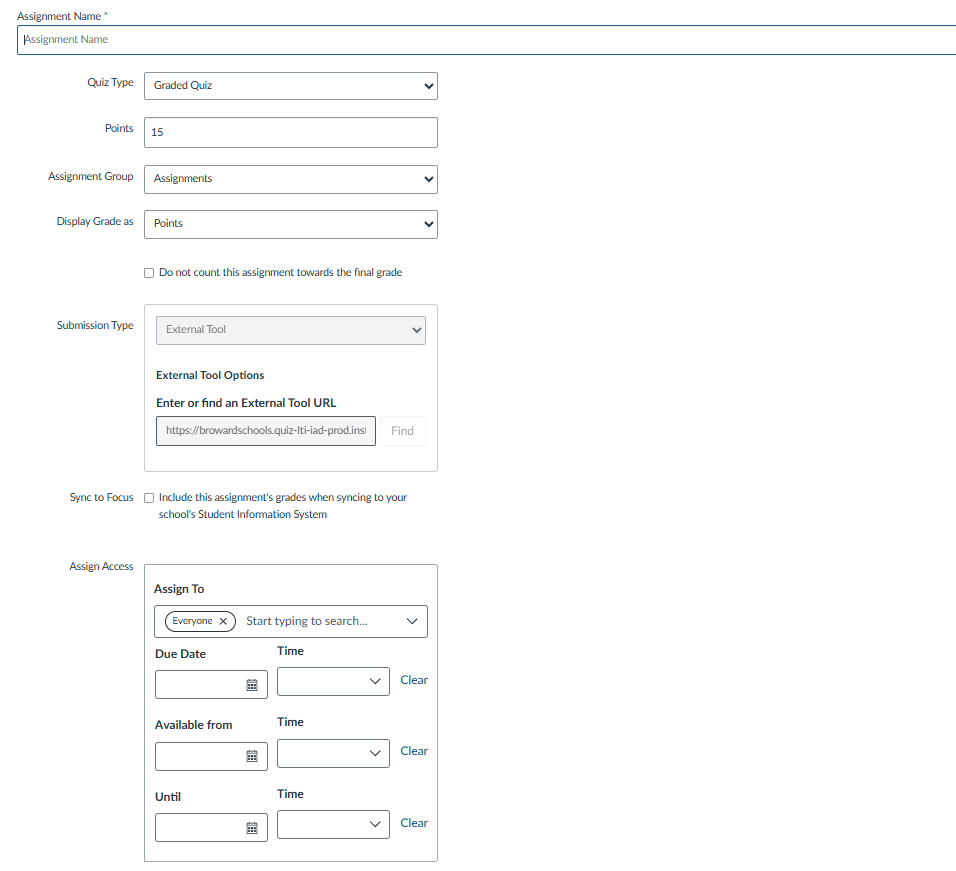
Step 9: (Complete Quiz Required Fields)
Once the submit button has been clicked to create a new quiz, you will be required to complete the following fields:
- Assignment Name
- Due Date
- Available Date
- Until Date
Step 10: (Build Your Quiz)
Click the Build button to create your quiz.

Step 11: (Getting ready to import QTI file)
To import your QTI file generated by Copilot, click on the three dots on the top right hand corner of the screen to browse for the file:

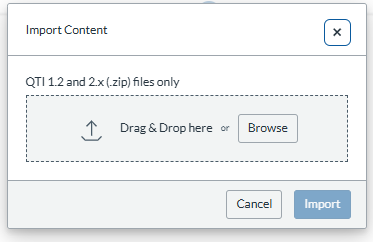
Step 12: (Browse and import QTI file)
Click the Browse button to select your recently downloaded QTI file.
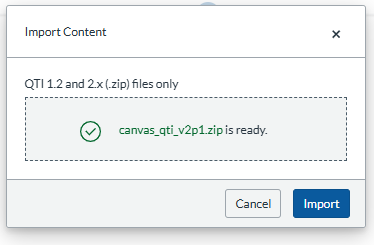
Step 13: (Start the import process)
Click the “Import” button once the file has been selected to start the process.
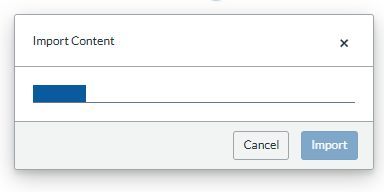
Step 14: (Import Process)
During the import process, you will see a screen showing your process:
Step 15: (Import Completion)
Once the QTI import process finishes, you will see your quiz generated with your questions.
Step 16: (Verify Your Questions)
I highly recommend that you check each question imported. Even with a perfect import, we should verify question quality, point values, and answer feedback before assigning to students.
Final note: Once the file has been successfully imported, please go to the settings portion of the Quiz to shuffle the questions and answers. Otherwise, the answers can all be denoted to one given position.
How do I know if it fails?
If your import fails, you might see a screen that looks like this:

While I have not seen any failures using the prompt provided as a guide, it is a possibility. If this is the case, review your prompt. Inform Copilot that your QTI file failed import and ask it to review the file generated as it should be created using strictly QTI v2.1 and have it regenerate the file.
Troubleshooting an error is outside of the scope of this article, but for the purpose of being thorough, I will provide some common reasons why the files will fail to import.
Canvas requires QTI v2.1 with a valid imsmanifest.xml and assessmentItem files that use the v2.1 namespaces and templates.
- Uses
xmlns="http://www.imsglobal.org/xsd/imsqti_v2p1"in eachassessmentItem - Includes
responseDeclaration,outcomeDeclaration, andresponseProcessingwith the IMSmatch_correcttemplate - Provides a root
imsmanifest.xml(IMS CP v1.1) that references every item resource astype="imsqti_item_xmlv2p1" - Separates each question into its own
items/*.xmlfile and lists them in the manifest
If you are having trouble with your generated file, you could provide this information (if you are feeling adventures) in your prompting to get Copilot to regenerate the file.
Good luck!