INTRODUCTION
If you are an educator, and you are interested in providing an industry certification exam through Pearson Vue or known as Certiport testing software for students of other languages, this is your article.
This article will provide step by step (10 steps) instructions on how to setup an Exam “From Home Session” to provide students of other languages the opportunity to test for different industry certification exams in their native language.
REQUIREMENTS
As an administrator of exams, you will be required to have a Certiport account that enables you to be an “Organization Member”. If you don’t have this membership option in your drop down, you will need to speak to your department head or department administrator to enable this functionality in your Certiport account.
STEP 1
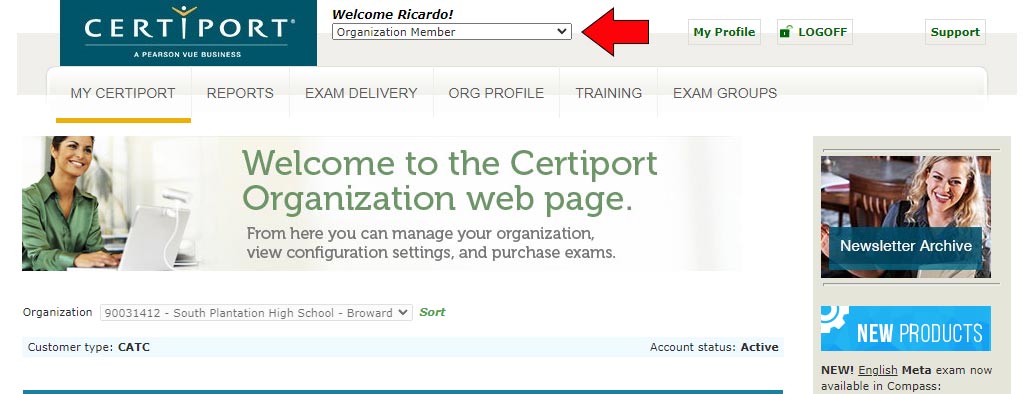
Once you have logged into the Certiport website (Click here to go to Certiport), you will need to change your account role to be able to create the session. You can do this by clicking on the drop down menu at the center-top of the screen just below “Welcome ” and your name. Once selected, choose “Organization Member”.
STEP 2
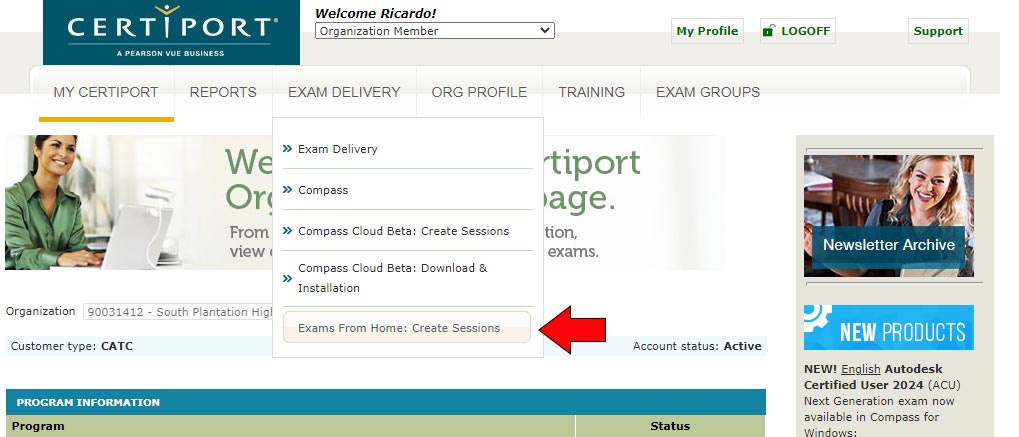
You will want to create a session by hovering on the “Exam Delivery” option on the menu next to “Reports”. Once you hover over this option, you will see a sub-option called “Exams From Home: Create Session”. Click on this option.
STEP 3
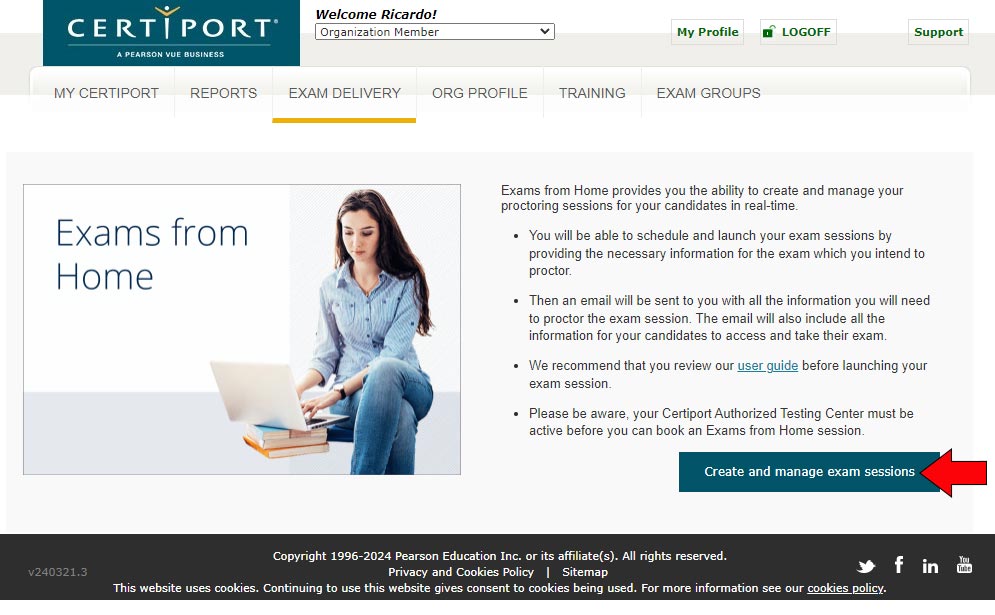
To start creating your session, click on the button in green that reads, “Create and manage exam session”. See below:
STEP 4
Specify a session name. This session name is only visible by the creator and it is used to track your session. It will not be visible to candidates and is only for your reference. Once done entering the session name, click the “Create Session” button on the lower right corner.

STEP 5
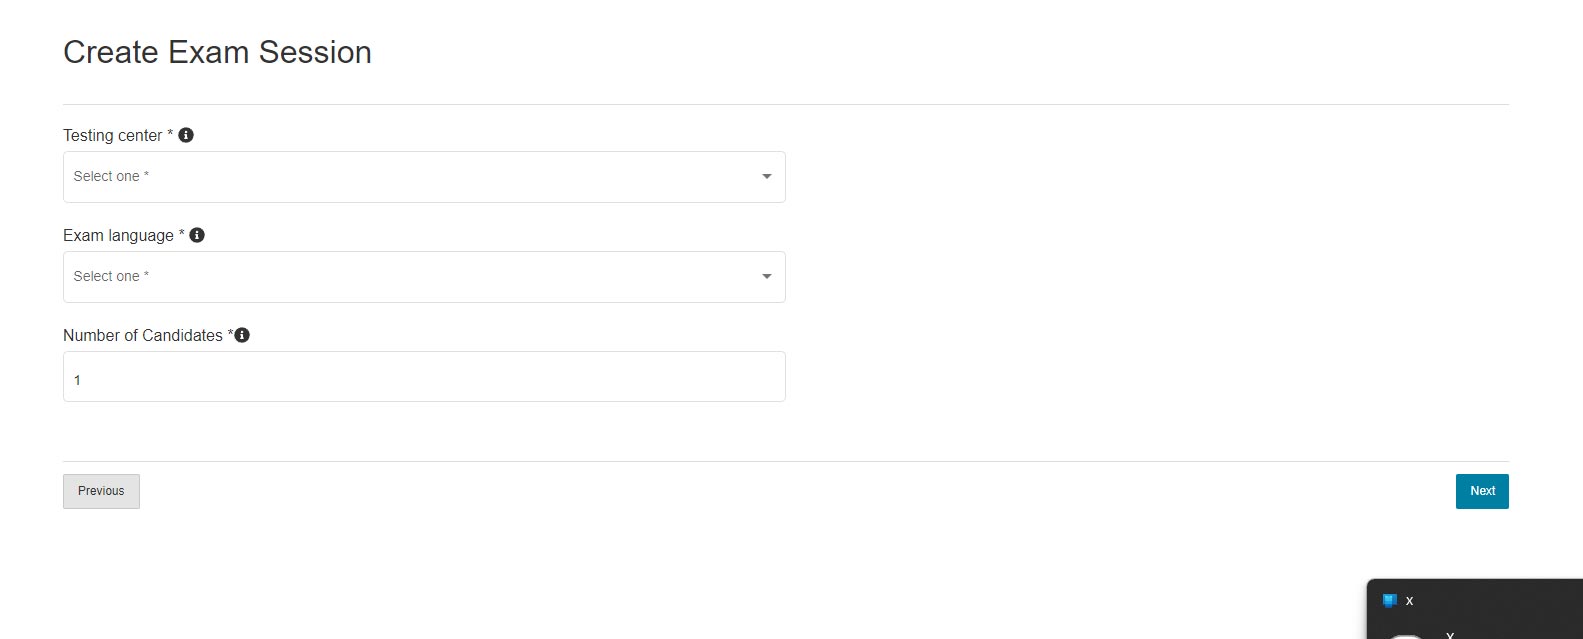
Once the session is created, you will be taken to the next screen which looks like this (see below).
STEP 6
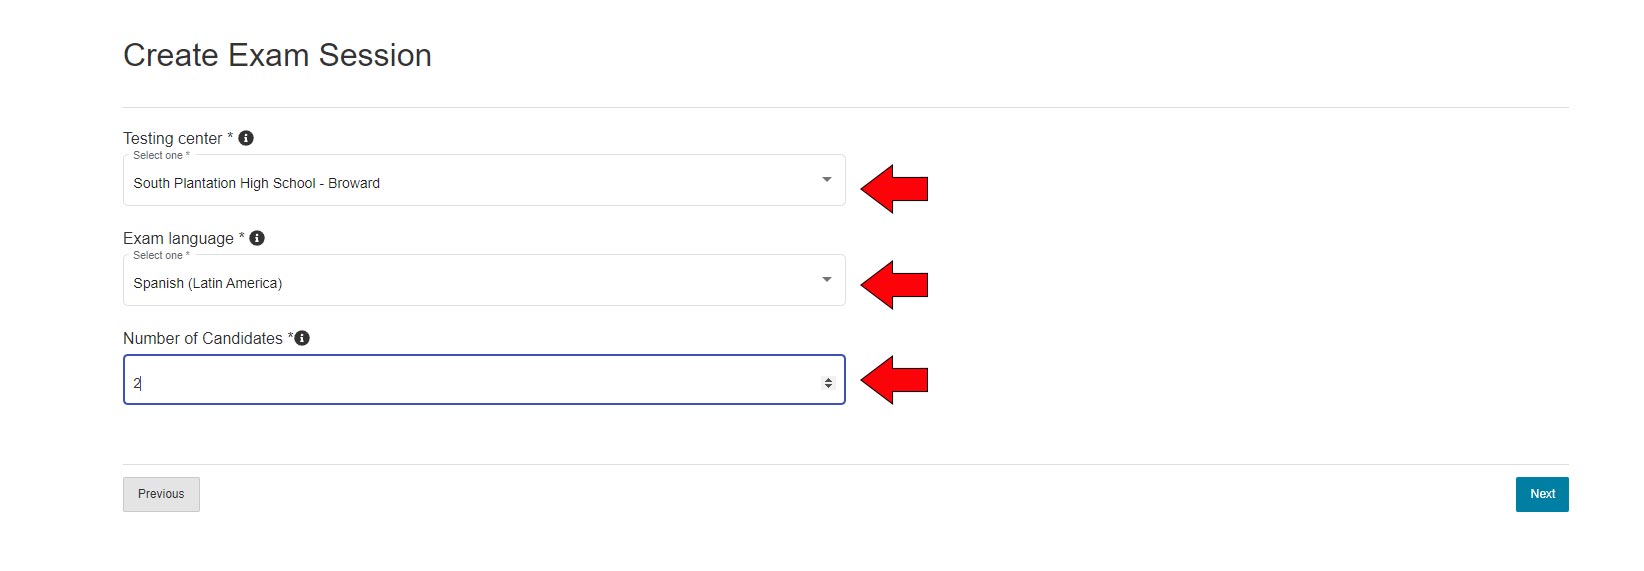
For each section, fill out the appropriate information. The testing center will be your school. Unless you belong to multiple locations, you should only see your school as an option. Others might have multiple options. Choose your school as the testing center
Choose the exam language you wish to test your student in. There are many different languages to choose from and keep in mind that whatever language you choose, the emails with the links will arrive in your inbox in that language.
Finally, choose the number of candidates that will be testing during that session.
STEP 7
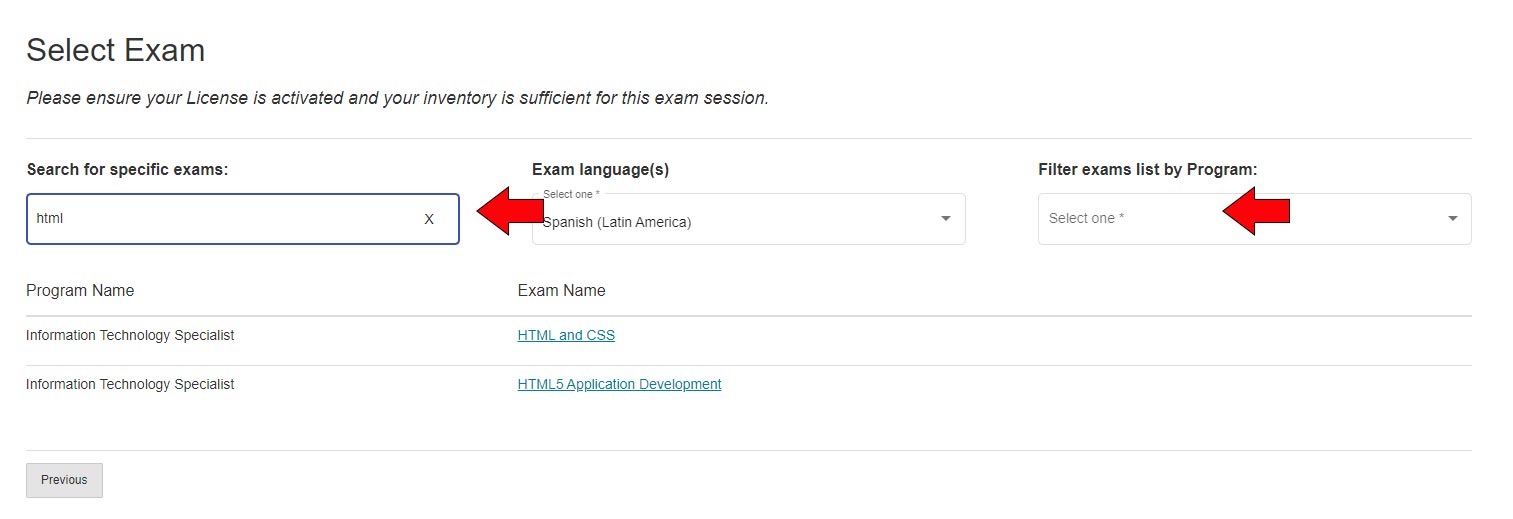
Select your exam from the lists of exams show below. It might be easier to search for your exam by entering a few characters from the name of your exam in the search option. Alternatively, you may also filter exams by program on the last drop down option. Select your exam once it has been located.
STEP 8
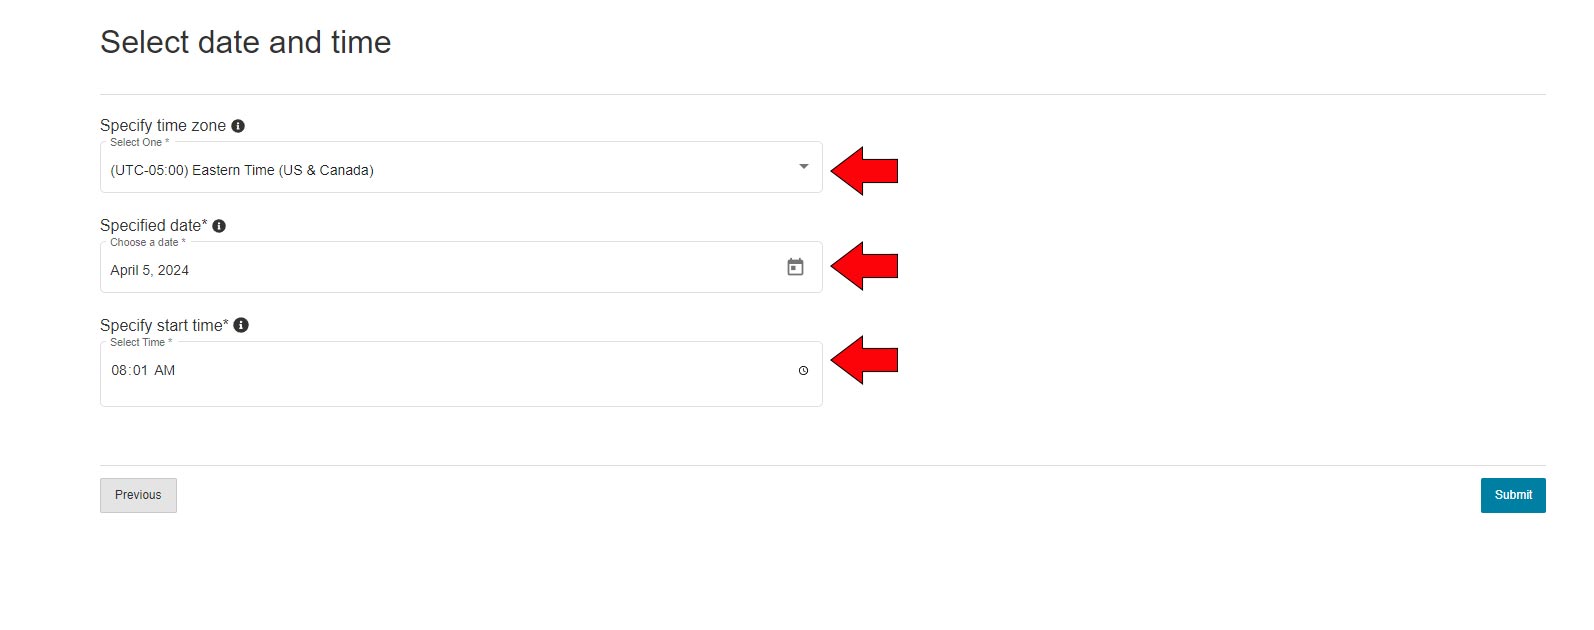
Choose your date and time by completing all three fields listed on the page. The “Time Zone” will be a drop down to choose your time zone. The “Specific Date” field can be entered as a numerical value or you can click on the calendar icon to select your dates based on the calendar. Finally, you can enter a time in time format or you can click on the “clock” icon to select a time.
STEP 9
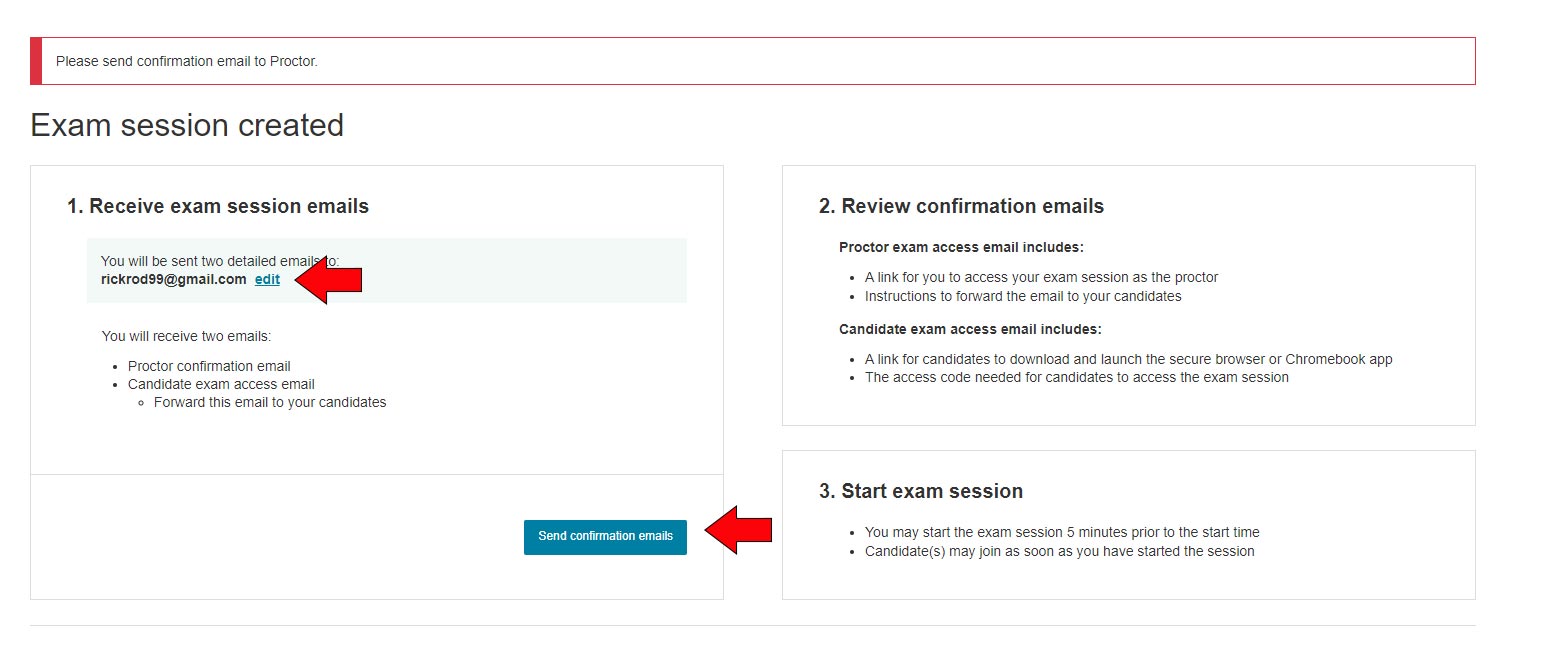
Exam session created page. Once you have clicked on the “Submit” button on the choose your date and time page, you will be redirected to the “Exam Session Created” page.
On this page you will need to validate your email address as you will be receiving emails with important candidate testing information and links.
Click on the “Send confirmation email” button to receive two emails with important information.
Proctor email confirmation includes:
1. A link for you to access your exam session as a proctor.
2. Instructions on forwarding your email to your candidates.

Candidate access email includes:
1. A link for the candidate to download and launch the secure browser or Chromebook app.
2. Candidates can start as soon as the proctor starts the session.
STEP 10
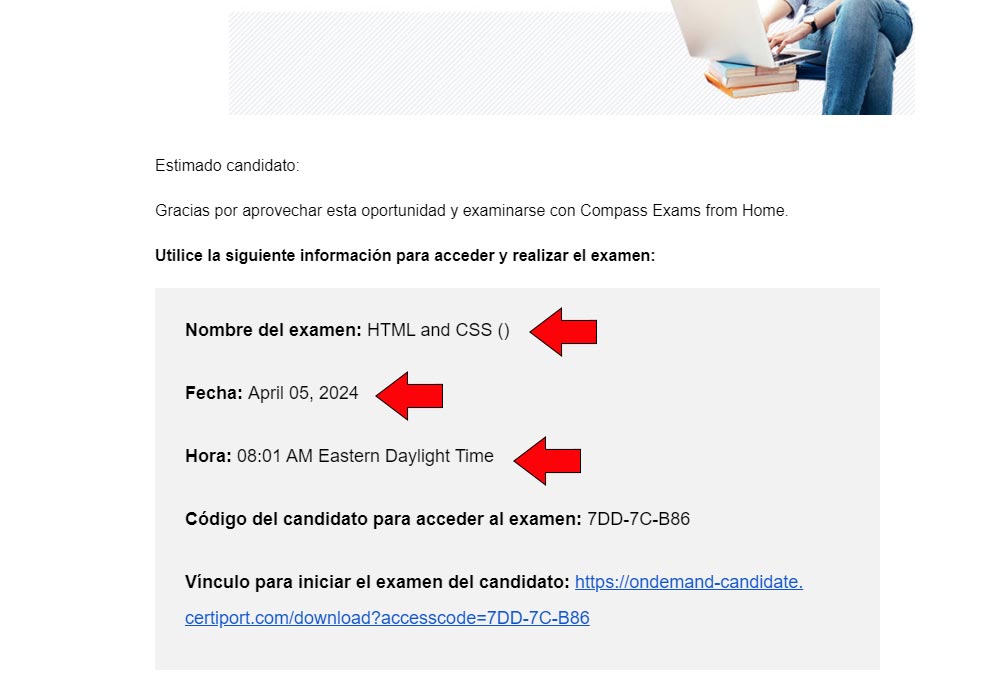
Confirmation page. Once you have clicked on the “Send Confirmation Email” button, you will be redirected to the confirmation page. Note, your confirmation page will be in the language that you chose during the session setup. Verify that your exam type or name, date, and time are all correct.
VIEWING AND MANAGING YOUR SESSIONS IN CERTIPORT
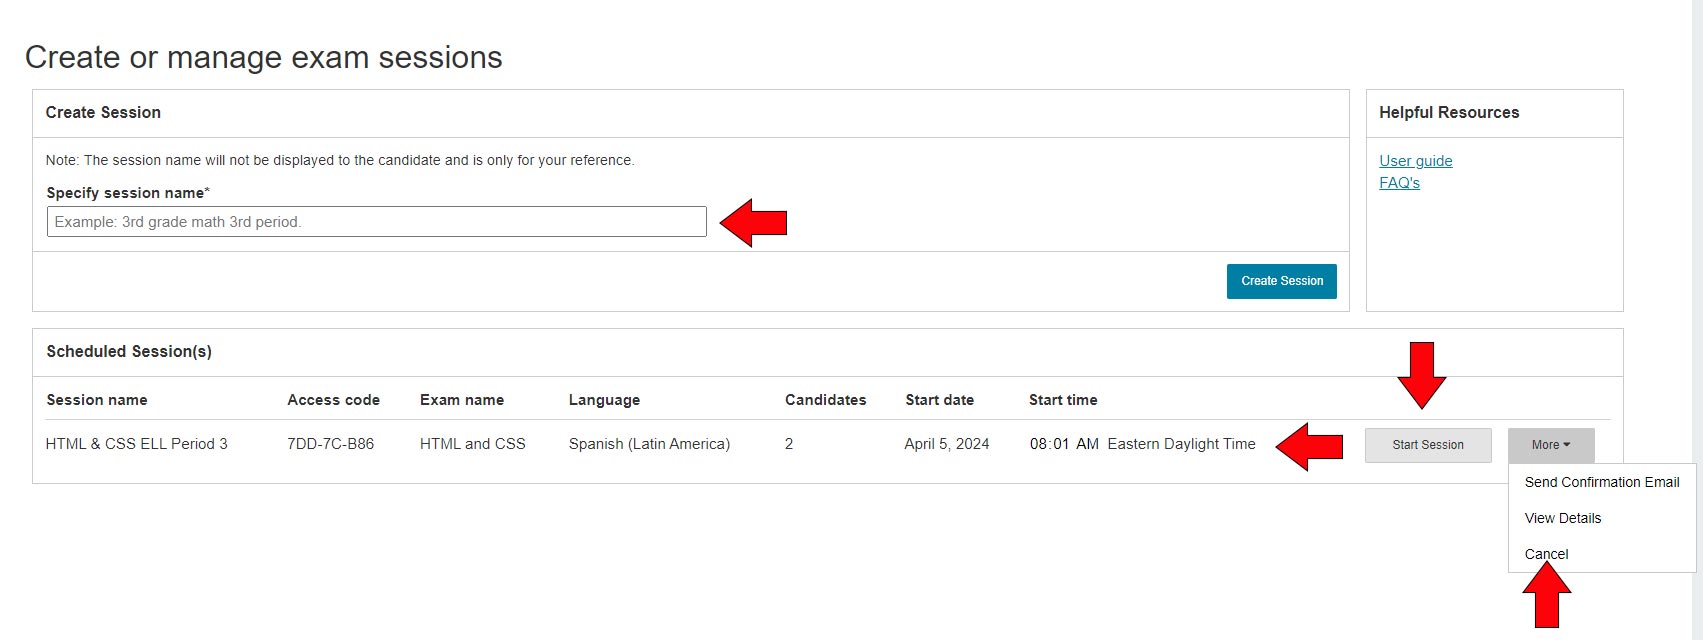
Once you have completed your session creation, you can view and manage your sessions by going back through step 1, step 2, and step 3. It will take you to the “Create Session” screen and as well as the manage session screen.
On this screen (below) you can do the following:
- Create a new session.
- Start an existing session.
- Cancel an existing session.
- View details of an existing session.
