
Adobe InDesign CC Vocabulary For Students
These are important vocabulary words needed by students to master InDesign CC application.
These are important vocabulary words needed by students to master InDesign CC application.
This is an assignment I provided my students to practice using InDesign CC 2015.

This is a business card assignment to be created in Adobe InDesign application. There are a set of instructions to follow in order to create professional looking business cards.
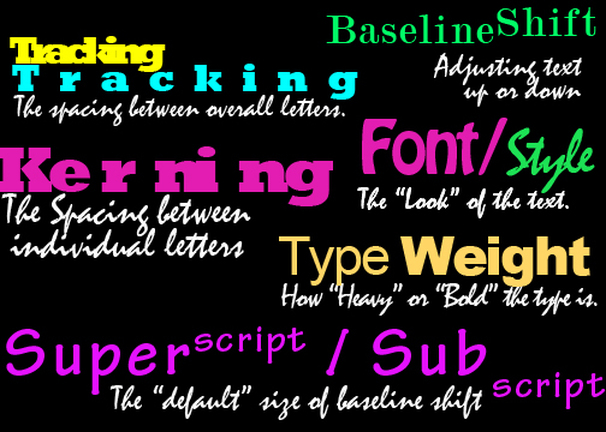
These are common terms and definitions used in Adobe products such as InDesign.

A simple study guide to understand the Adobe InDesign CC tools and User Interface.
High school students assignment. Grades 9 – 12 Adobe InDesign Calendar Assignment with examples.
Many different types of brochures can be used to build an image for your company, promote a specific event such as a party, update a specific products info, or for many other things. This project requires students to think about a product or service that they might want to advertise for themselves, or for another … Read more